Table of Contents
-
Introduction
-
What Is DTRF Transfer?
-
Why DTRF Beats Other Printing Methods
-
Must-Have Tools for DTRF Success
-
Prepping for the Perfect Transfer
-
How to Do DTRF Transfer: Step-by-Step
-
Common Mistakes and How to Avoid Them
-
Pro Tips for Flawless DTRF Transfer
-
Taking Care of Your Finished Products
-
Conclusion
-
FAQs
Introduction
Ever seen a t-shirt so vibrant it almost glows? Chances are, it was made with DTRF transfer. If you’re wondering how to do DTRF transfer and actually make it look flawless—you’re in the right place. Whether you’re a hobbyist, small business owner, or just looking to jazz up your closet, this guide will walk you through pro-level tips, techniques, and common pitfalls. Let’s make your prints pop and your shirts scream “custom-made awesomeness.”
What Is DTRF Transfer?
So, let’s start with the basics. DTRF stands for Direct to Release Film. It’s a heat-based method that involves printing your design on a special film and transferring it onto a fabric surface using heat and pressure. Think of it like a tattoo for your clothes—one that doesn’t fade after two washes.
Unlike vinyl or screen printing, DTRF gives you the freedom to print full-color, high-resolution images—even gradients! It’s perfect for detailed artwork and complex designs.
Why DTRF Beats Other Printing Methods
Wondering why everyone’s raving about DTRF? Let’s put it up against other popular methods.
| Method | Color Range | Durability | Ease of Use | Fabric Versatility |
|---|---|---|---|---|
| Vinyl | Limited | Good | Moderate | Mostly cotton |
| Screen Printing | Basic | Great | Difficult | Cotton preferred |
| Sublimation | Bright | Great | Easy | Only polyesters |
| DTRF Transfer | Unlimited | Excellent | Moderate | Almost all fabrics |
Yep, DTRF is kind of the rockstar of printing—especially when you nail the process.
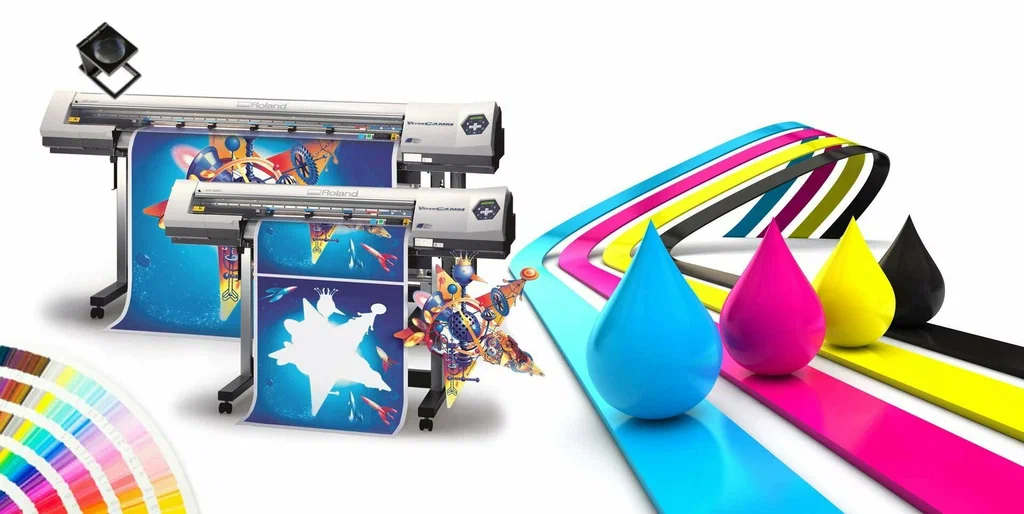
Must-Have Tools for DTRF Success
To pull off a flawless DTRF transfer, you need the right gear. Here’s your starter kit:
-
Heat Press Machine – Must-have. No shortcuts here.
-
DTRF-Compatible Printer – Pigment or textile ink is best.
-
DTRF Film Sheets – The star of the show.
-
Hot Melt Powder – Helps the ink bind to fabric.
-
Lint Roller – Because lint is the silent killer of clean prints.
-
Teflon Sheet or Parchment Paper – Protects your design during pressing.
-
Heat Tape (Optional) – Keeps your film in place during pressing.
Don’t worry if it feels like a lot—you’ll get used to it after a few rounds.
Prepping for the Perfect Transfer
Here’s the secret: prepping your materials properly is half the battle. You don’t want to waste a killer design on a wrinkled shirt or dusty press.
Get Your Fabric Ready
-
Use a lint roller to remove fuzz or pet hair.
-
Pre-press your garment for 5 seconds to smooth wrinkles and remove moisture.
Prep Your Film
-
If you’re printing the design yourself, always mirror it before printing.
-
Apply hot melt powder while the ink is wet.
-
Cure the powdered film under a heat source until it feels dry and rubbery.
Set Up Your Press
-
Ideal heat: 300–320°F
-
Time: 15–20 seconds
-
Pressure: Medium (check using a test print)
How to Do DTRF Transfer: Step-by-Step
Alright, here’s the meat of it. Let’s dive into the actual process of how to do DTRF transfer for flawless results.
Step 1: Print & Powder
If printing yourself, make sure the ink is still wet when you apply the hot melt powder. Dust it evenly, shake off excess, then cure it.
Step 2: Pre-Press Fabric
Place the garment on the press and heat it for about 5 seconds. This removes any hidden moisture and evens out the surface.
Step 3: Align the Design
Lay the cured film (design side down) exactly where you want it. Use heat tape if needed to keep it steady.
Step 4: Press It
Close the press with medium pressure for about 15–20 seconds. The magic happens here, so don’t rush or skimp on pressure.
Step 5: Let It Cool
Do NOT peel while hot. Let it cool completely (cold peel), or risk ruining the design.
Step 6: Final Press
After peeling the film, lay a Teflon sheet over the design and press again for 5–10 seconds. This locks everything in place and boosts durability.
Common Mistakes and How to Avoid Them
Let’s be real—even the pros mess up sometimes. But if you’re new, these are the top rookie mistakes to dodge.
| Mistake | What Went Wrong | Fix It By… |
|---|---|---|
| Ink not transferring | Not enough heat or pressure | Check your press settings |
| Smudging or ghosting | Peeled film too early | Wait for a cold peel |
| Film sticking to fabric | Fabric too moist or dirty | Pre-press & lint roll beforehand |
| Edges lifting | Uneven pressure | Use a pressing pillow or adjust press |
Pro Tips for Flawless DTRF Transfer
Now we’re in pro territory. These tips are what take your prints from “decent” to “dang, that’s impressive!”
1. Always Test First
Don’t risk your best hoodie. Do a test run on scrap fabric to check heat, time, and pressure.
2. Use Quality Film
Not all DTRF films are equal. Go for trusted brands even if they cost a bit more—it’s worth it in the long run.
3. Don’t Rush the Cool Down
It’s tempting to peel right away, but patience pays off. Cold peel means no smudges, no tears.
4. Store Prints Flat
Humidity and heat can ruin unused DTRF prints. Store them flat in a cool, dry place.
5. Master the Final Press
This extra 5–10 seconds makes your design pop and last longer. Never skip it!
Taking Care of Your Finished Products
You’ve done the hard work—now keep it looking great.
-
Wash inside-out in cold water.
-
Hang dry or tumble on low.
-
Avoid bleach or harsh detergents.
-
Don’t iron directly on the design.
With the right care, your prints can outlast your t-shirt.
Conclusion
You made it! By now, you’ve learned not just how to do DTRF transfer, but how to do it like a pro. From prepping your workspace to locking in that final press, each step matters. With these tips in your toolbox, you’re set to create vibrant, long-lasting designs right from home. So go ahead—fire up that press and start creating wearable masterpieces!
FAQs
1. Can I reuse DTRF film for multiple shirts?
Nope. Each film is a one-time use. You’ll need to print or buy a new one for every shirt.
2. What fabrics work best for DTRF?
Cotton, polyester, and blends all work well. Avoid stretchy or heavily textured fabrics.
3. Is hot melt powder absolutely necessary?
Yes. It acts like glue between the ink and the fabric. No powder, no stick.
4. Can I use an iron instead of a heat press?
Unfortunately, no. An iron won’t give you the consistent heat and pressure needed for DTRF.
5. How long do DTRF prints last?
With proper care, they can last 50+ washes without fading or cracking.