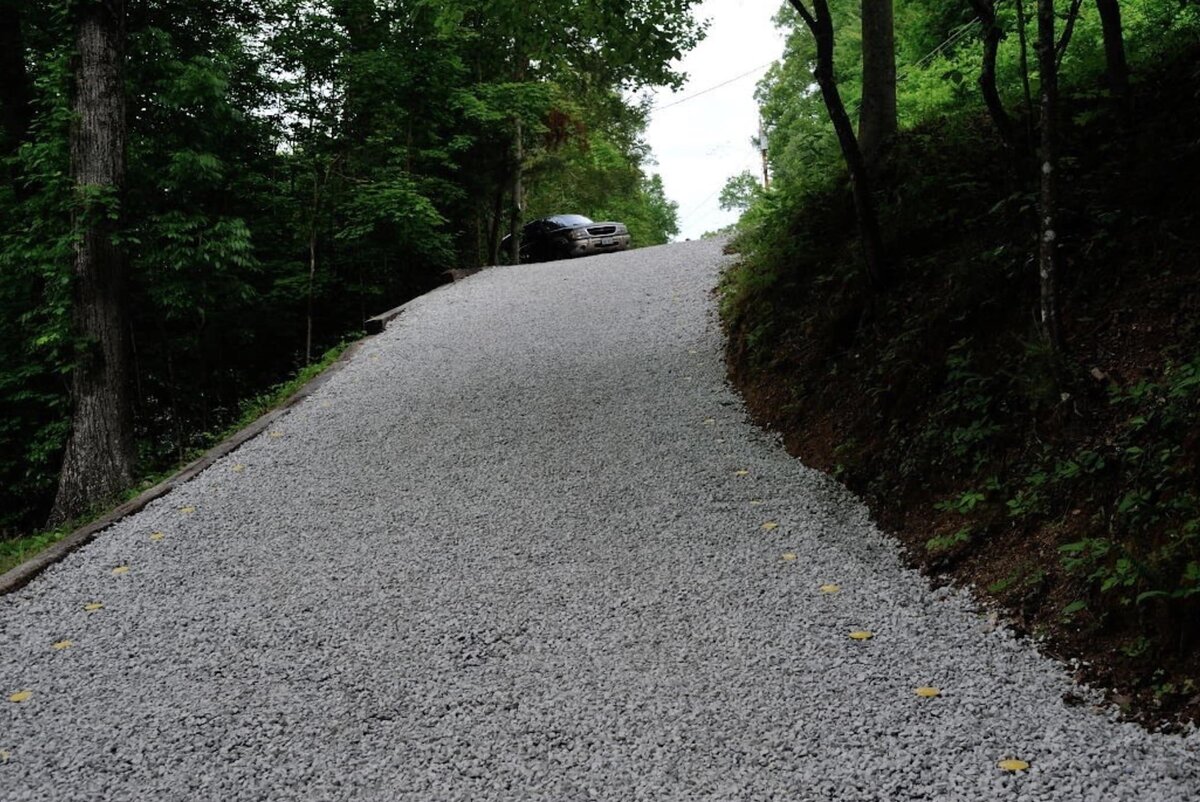
How to lay a gravel driveway:
Gravel driveways are a popular choice for homeowners looking for an affordable, attractive, and low-maintenance alternative to asphalt or concrete. Laying a gravel driveway might seem like a big project, but with the right tools and preparation, it can be a rewarding DIY task. This guide will answer the question of how to lay a gravel driveway, from planning and preparation to finishing touches.
Step 1: Planning and Design
Before you start digging, spend time planning your gravel driveway.
Determine the dimensions:
Once the driveway is chosen, start measuring its length and width. A standard single-car driveway is typically 3 meters wide, while a double-car driveway is 5–6 meters wide.
Check local regulations:
Some areas have zoning rules about driveways and surface water runoff. Check with your local council before starting.
Choose your gravel:
Gravel driveways use a three-layer system: a base layer (larger stones), a middle layer (medium-sized gravel), and a top layer (decorative or finishing gravel like pea gravel or crushed granite).
Step 2: Gather Tools and Materials
You’ll need the following tools and materials:
- Marking spray, string, and stakes
- Shovel or mini-excavator
- Wheelbarrow
- Rake
- Landscaping fabric
- Gravel (varied sizes for layers)
- Compactor or roller
Step 3: Mark Out the Driveway
Use string lines, stakes, or marking spray to outline your driveway path. Be sure the driveway is accessible from the road and leads to your desired parking or garage area.
Step 4: Excavate the Area
Excavation is essential for durability.
- Depth: Dig to a depth of around 20–30 cm (8–12 inches), depending on traffic and soil conditions. Remove all turf, topsoil, and debris.
- Drainage: Ensure the surface slopes slightly (1-2%) away from buildings to prevent water pooling.
Step 5: Install Edging (Optional but Recommended)
Edging helps keep the gravel in place and improves the visual appeal. You can use timber, steel, brick, or stone borders to outline the driveway and secure the gravel layers.
Step 6: Lay Landscaping Fabric
Lay a layer of landscaping or weed barrier fabric across the entire excavated area. This helps to suppress weed growth and prevent gravel from sinking into the soil over time.
Step 7: Add the Base Layer
This layer is typically made up of crushed stone or large gravel (20–40 mm size).
- Distribute the base layer of gravel to a thickness of approximately 10 to 15 cm (4 to 6 inches).
- Use a garden rake to spread the material evenly across the surface.
- Compact the gravel thoroughly using a vibrating plate compactor or a roller. A firm and level base is essential to ensure your driveway remains durable and structurally sound over time.
Step 8: Add the Middle Layer
This layer provides structural support and bridges the gap between the base and surface.
- Choose gravel with a particle size between 10 mm and 20 mm for optimal performance.
- Apply a top layer with a thickness of approximately 5 to 10 cm (2 to 4 inches).
- Again, level and compact thoroughly to ensure even coverage and support.
Step 9: Add the Top Layer
This is the visible, finishing layer that defines the appearance of your driveway.
- Opt for decorative options like pea gravel, crushed stone, or slate chips.
- Lay the layer to a depth of around 5 cm (2 inches) to achieve a neat, uniform finish.
- Rake the top layer for a smooth finish and compact lightly to settle it in place.
Step 10: Maintain Your Driveway
Gravel driveways require regular maintenance to keep them looking great and functioning well.
- Gravel Maintenance: Regularly rake the surface to keep it level and top up low areas with additional gravel as needed.
- Weed control: Pull weeds that break through or use a natural weed killer.
- Edge trimming: Keep edges clean and sharp by removing overflow gravel.
Pros of a Gravel Driveway
Affordable:
Gravel is significantly less expensive than asphalt or concrete.
Easy to install:
A feasible DIY project with some labour.
Good drainage:
Gravel is permeable and reduces water pooling.
Customisable look:
Available in many colours and textures.
Cons to Consider
Maintenance:
Requires regular upkeep to remain level and weed-free.
Snow removal:
Clearing snow can displace gravel, requiring adjustments.
Cost Breakdown (UK Estimate)
Gravel:
£30–£60 per tonne, depending on type and supplier.
Fabric and edging:
£100–£300 depending on size and materials.
Tools hire (if needed):
A compactor hire costs around £30–£50/day.
Labour (if hiring professionals):
Final Tips
- Avoid using only decorative gravel—it shifts too easily without a structural base.
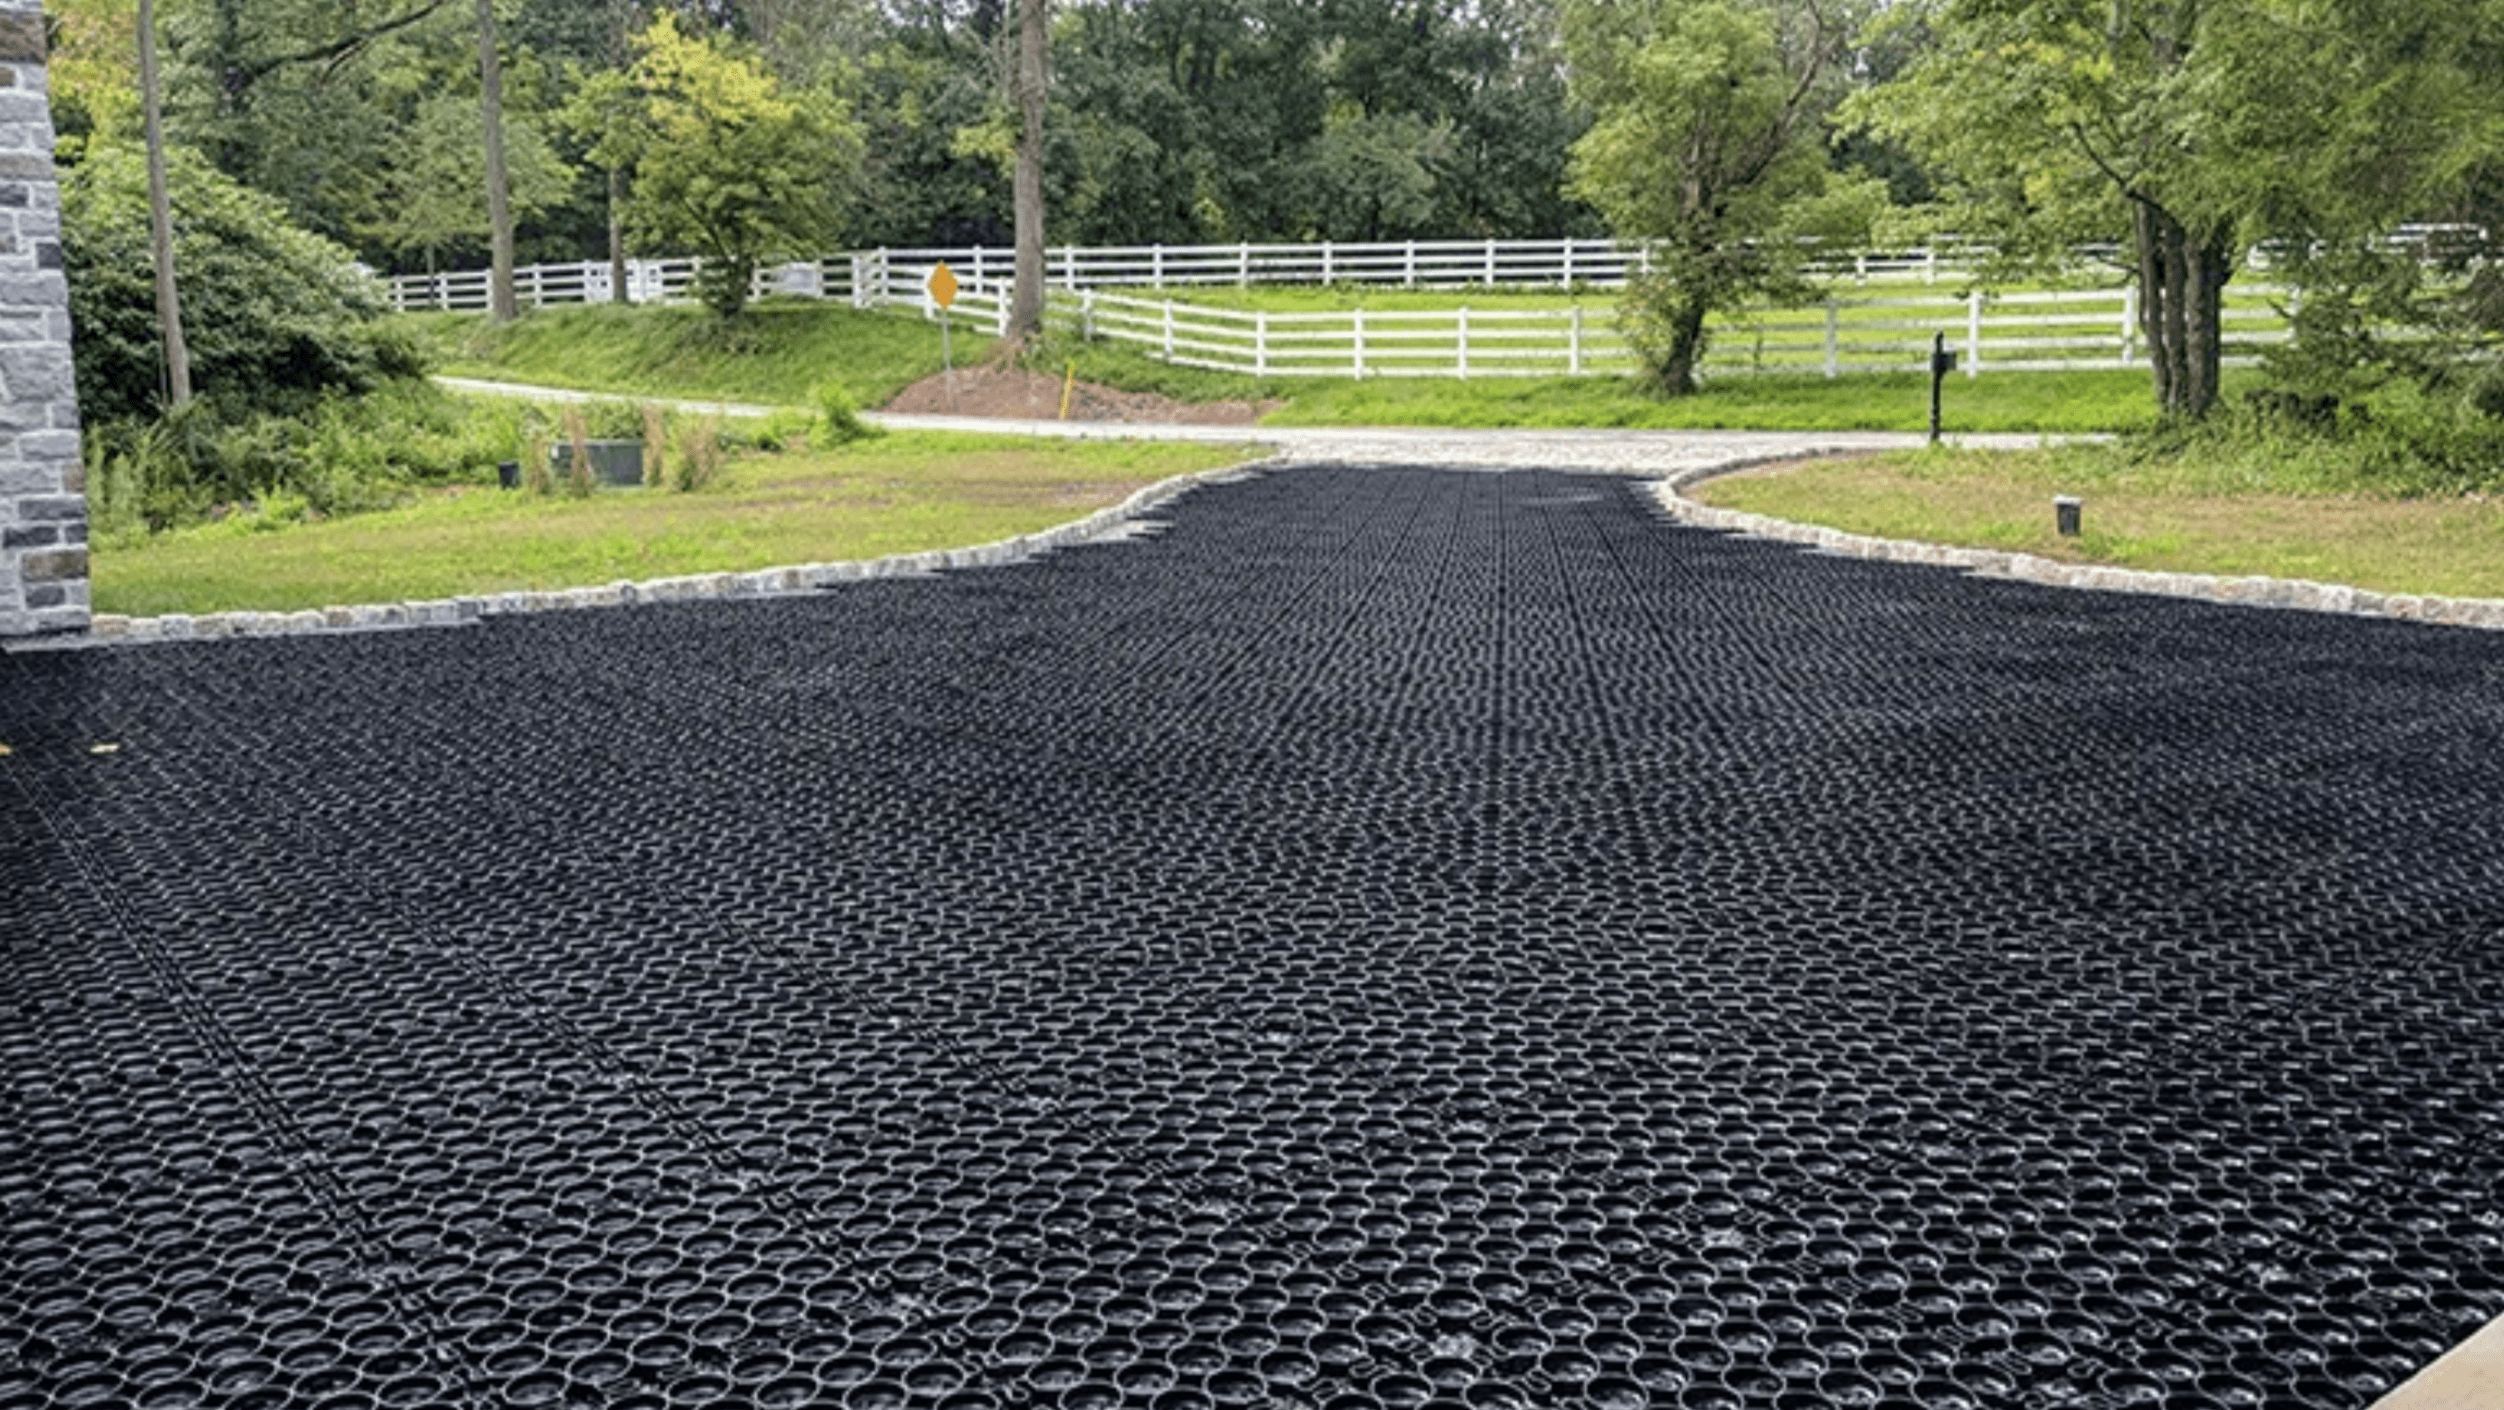
- Consider installing a gravel grid underneath for added stability and to reduce migration.
- Always compact each layer thoroughly to ensure long-term durability.
Conclusion:
Building your gravel driveway and groundworks in Southampton is a manageable project that requires the right preparation and tools. Whether you’re upgrading your property or starting from scratch, this guide can help you achieve a solid, functional gravel driveway that meets your needs.